I had never heard of an optical printer with a Regular 8mm film camera. I had the idea that there ought to be one (at least) and that I could use it in my filmmaking. I thank Penny McCann for suggesting I apply for a Canada Council for the Arts grant to research and build one, and Matt McWilliams, without whom I would not have been able to get one made.

I see by the email archive I wrote to Matt on March 12, 2020 (appears as quite an ominous date now), saying I got a grant and might I engage him (for a pittance) to help me out. He agreed. Over the next few months I did, with much Matt help, build a Regular 8mm optical printer.
The idea is to take advantage of the unique format that is Regular/Double 8mm (the film that goes around twice!). In particular, the Double 8 format was in mind, imagining re-photographing 16mm (or Double 8) or Regular 8mm frames to place them purposely on either side of the 4-frame Double 8 image. One could plan, or rejoice in chance, how the multi-frame movie might look and feel.
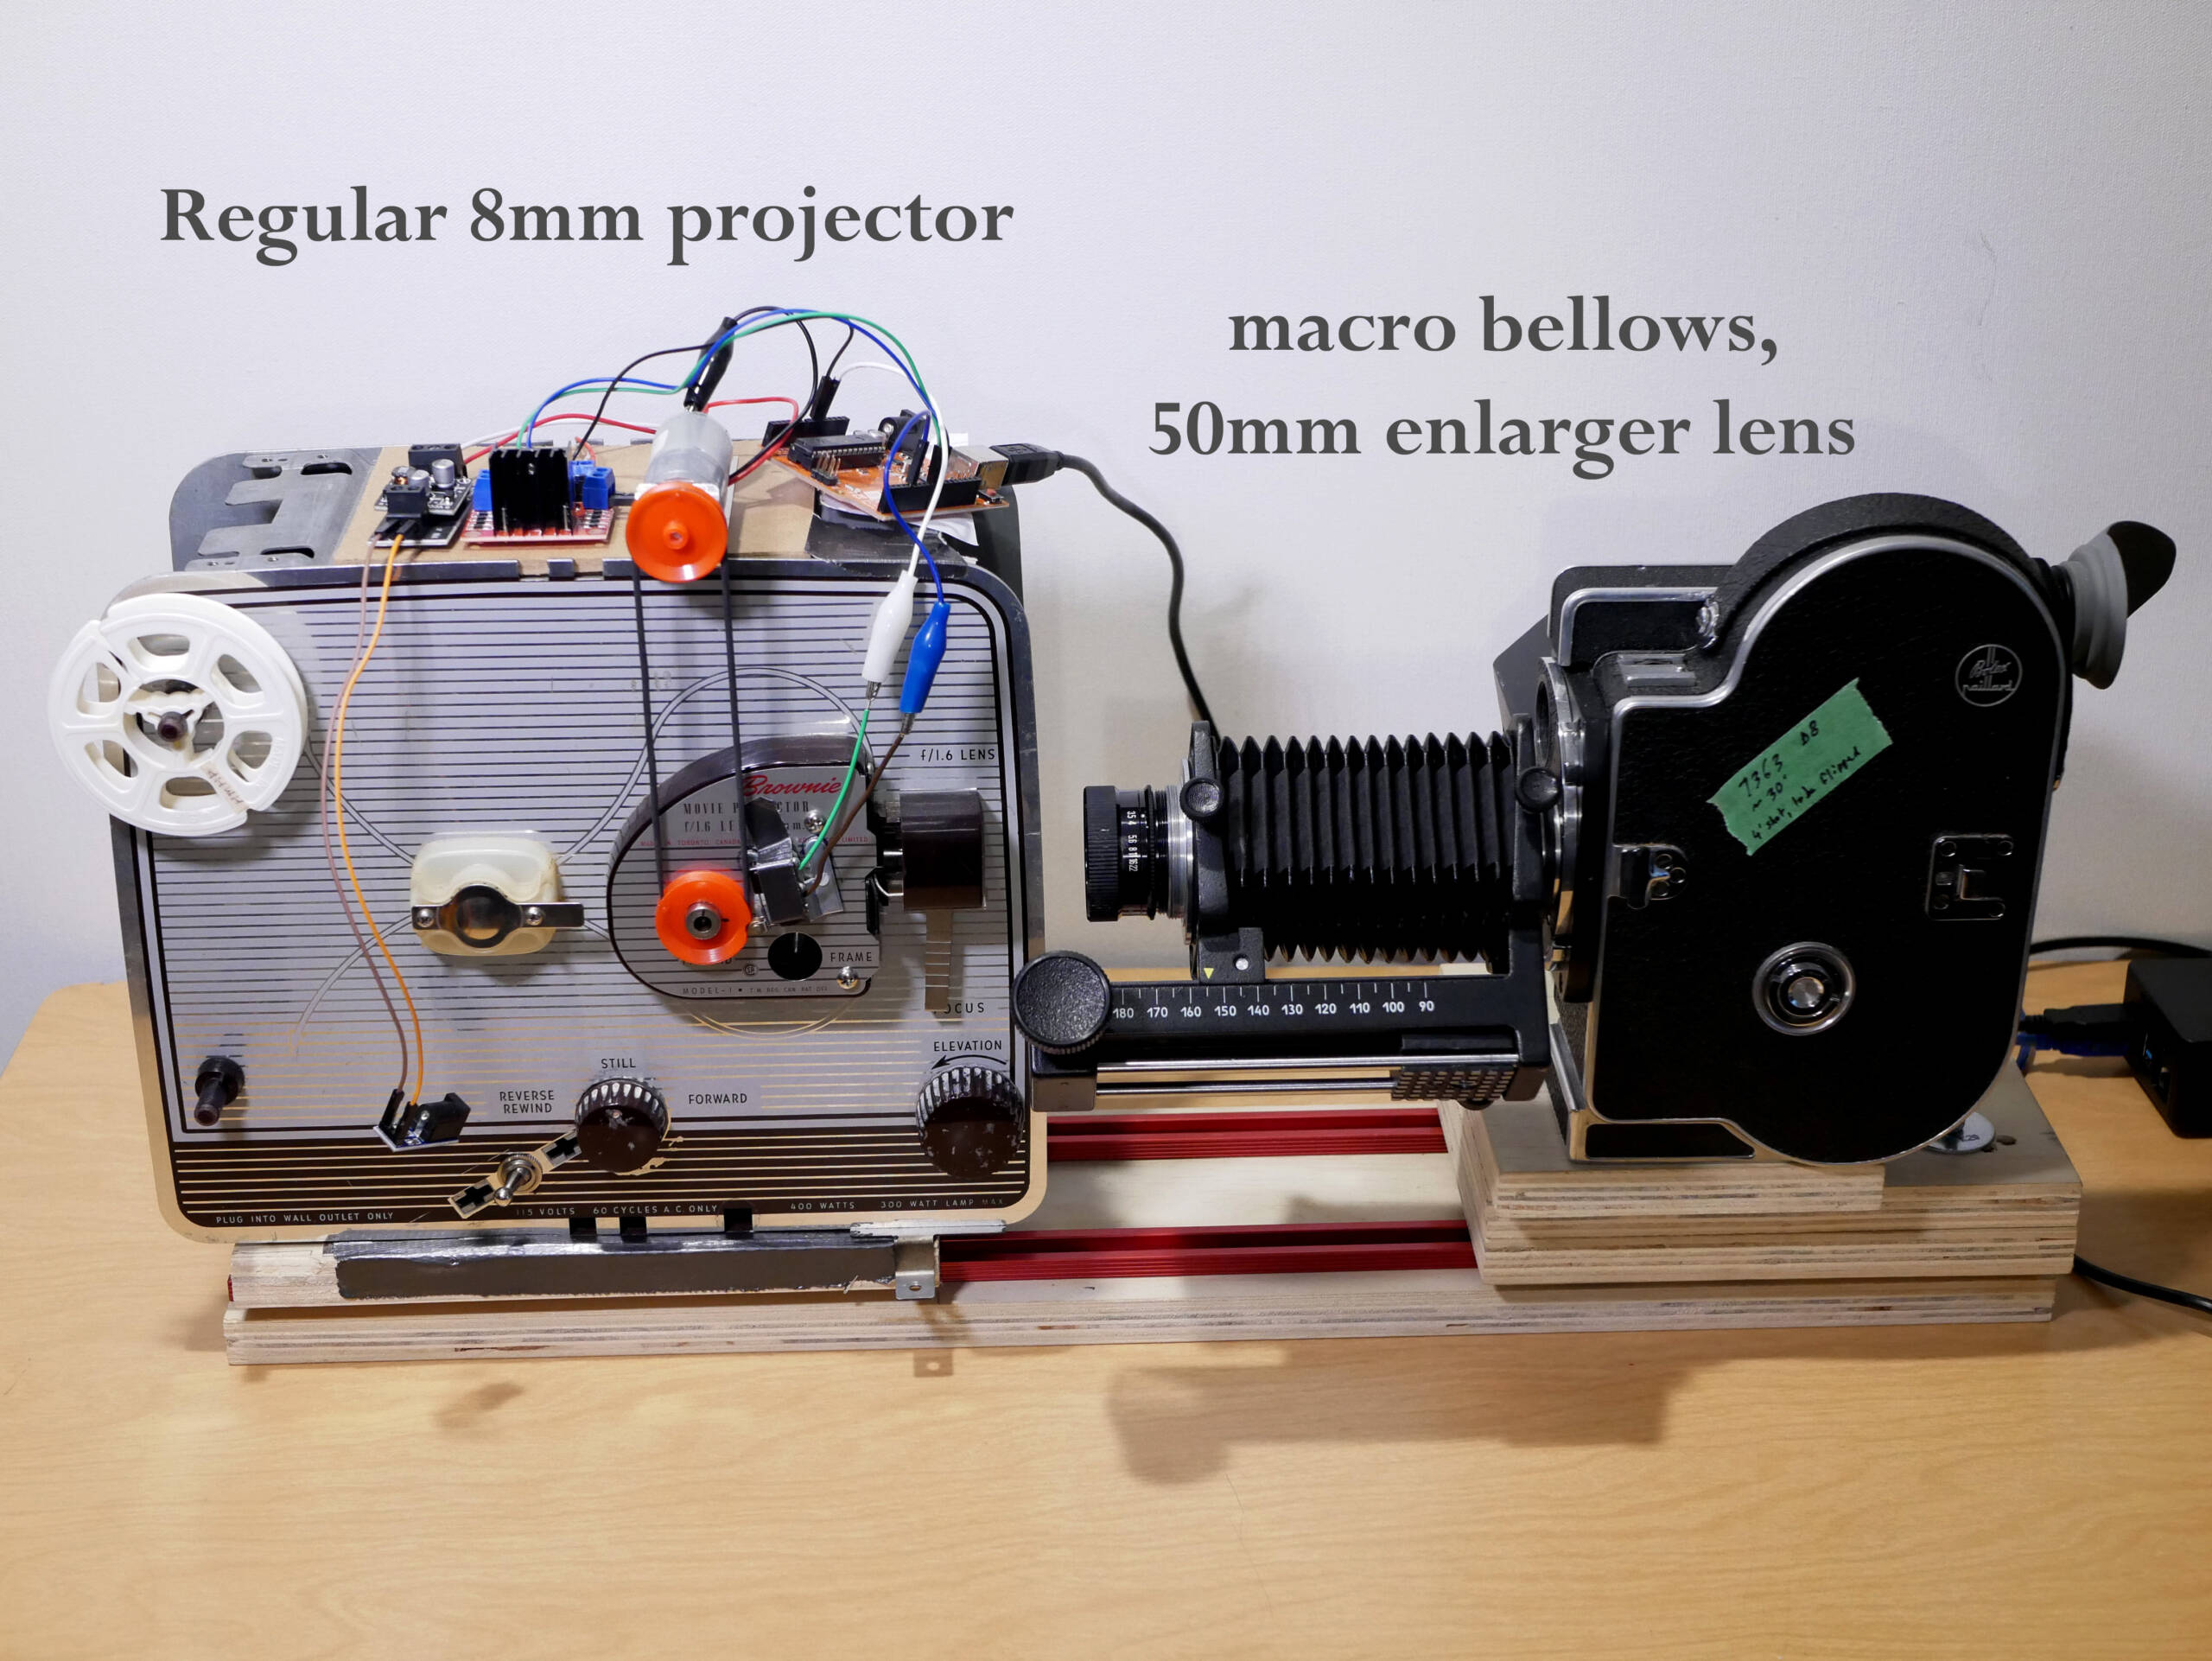
The camera is a Bolex H-8 REX-4, which I bought from Jean-Louis Seguin. I modified two different projectors to provide the “negative”: a Noris 200-II 16mm (from a take-it-if-you-can-use-it box of film stuff) and a Kodak Model-1 Regular 8mm (from a Kijiji enquiry that became a gift: “oh, you would use it?!”).


The camera is advanced (forward or backward) one frame at a time by a DC motor connected to the 1:1 drive shaft on the REX-4. The projector is advanced one frame at a time by a DC motor connected to a shaft of the film transport mechanism. The DC motors are activated by an L298N motor driver and an Arduino UNO or Nano microcontroller. The automation of steps is programmed by Matt’s MCopy software.

The trickiest part was creating a switch mechanism (and holding it firmly in just the right place) that would open and close relative to the projector advancing exactly one frame. Then to have the open/closed message communicated and the motor started or stopped. On the Kodak I nipped a bit out of the pulley so at that point the microswitch opens. On the Noris I dabbed a bit of hot glue on the pulley to press the microswitch closed at that point.


Other new tricks for this old dog were devising and building a base, hacking pulleys and belts so the motor would turn the projector shafts, guessing and buying wrong and eventually right electronic components, connecting all the wires, then getting my head in to the software programming way of thinking. It was not my usual brainflow and it was frustrating, so required patience and time. In the end I learned a bunch about microelectronics and how to edit the Arduino language to make the machines do what I needed and how to troubleshoot when they didn’t.

To advance the Bolex transport, Matt modified the innards of an AC animation motor Jean-Louis gave me, installing an Arduino Nano, motor driver and 3D printed shaft with switch to detect one rotation.
The projector’s lamp is replaced by a 1W 3000K LED and driver, which could perhaps have its intensity controlled or be replaced by an RGB LED. For now I tape neutral density and/or colour correction filters (cut from a Rosco sample pack courtesy of Karl at LIFT, Liaison of Independent Filmmakers of Toronto) between the lamp and the “negative” (or whatever you have in the gate).

The camera and projector sit on their own platforms which independently slide on aluminum rails. The height of the camera lens and the projector gate had to shimmed in line with each other. I tried a macro bellows (eBay from Ukraine) adapted for C-mount on the camera, with an M42-thread 50mm enlarger lens. This may may work for reducing or enlarging the negative, but for 1:1 framing I used a set of Bolex macro extension tubes from Jean-Louis and the 50mm enlarger lens. This setup has an extremely shallow focus plane and trying to nail it by wiggling a wood platform is awkward and annoying – to be modified in future with a screw/crank system.


Other improvements to the setup would be assembling the projector’s electronic components in a box, similar to what Matt did with the camera animation motor box.

Pandemic truth be told, after doing a clip test to verify all the functions work, I felt burned out by … you know. So writing this is a gateway to getting back to it, imagining my image ideas coming to life and the child-like feeling of a cool tool that was built from bits and pieces.
Below are links to a sample optical printing project, to illustrate one idea for the machine. They are: 16mm shoot of skating with the Bolex H16 along cracks in lake ice (Kodak 3383, hand-processed as colour negative) and the Double 8 optical print of that footage. The second pass of the Double 8 film was shot with the original negative upside-down in the projector so it prints same-side-up as the first side of the Double 8. I shot 3 frames of each original frame on expired Kodak 7231 and hand-processed it as negative, so now positive image.
Reference links:
Matt McWilliams https://sixteenmillimeter.com/
Bolex H-8 REX-4 http://www.bolexcollector.com/cameras/h8rex4.html
Jean-Louis Seguin https://www.bolexpert.com/
LIFT (Liaison of Independent Filmmakers of Toronto) https://lift.ca/
Penny McCann https://vimeo.com/pennymccann
Noris 200-II 16mm projector https://optical-toys.com/index.php/de/detailansicht/P16-NORI-011-4.html
Kodak Model-1 Regular 8mm projector
https://www.thehenryford.org/collections-and-research/digital-collections/artifact/124569/


Related Posts