A film friend recently asked for help, with his Elmo C-300 “only a potentiometer must be exchanged”, then it would work perfectly again – there I offered somewhat carelessly my help, because if there is something I do well, it’s soldering. But the operation was a bit bigger, because one simply couldn’t get close to the said pot for manual exposure control, without dismantling the camera quite far. In the following, I would like to show how this can be done.
By the way, the operation was successful, the potentiometer from a donor camera was transplanted, and the camera works just as conditionally as before: The fault was not the potentiometer at all, but probably a hooked moving coil instrument… But then that’s too built up for me. If it were my own camera, I might have tried my luck. 🙂
And here’s the abundantly illustrated guide:

First, loosen the two visible screws at the front of the bottom. 
Then fold up the battery compartment cover and loosen the two screws at the top of the corner and remove including the sheet metal. 
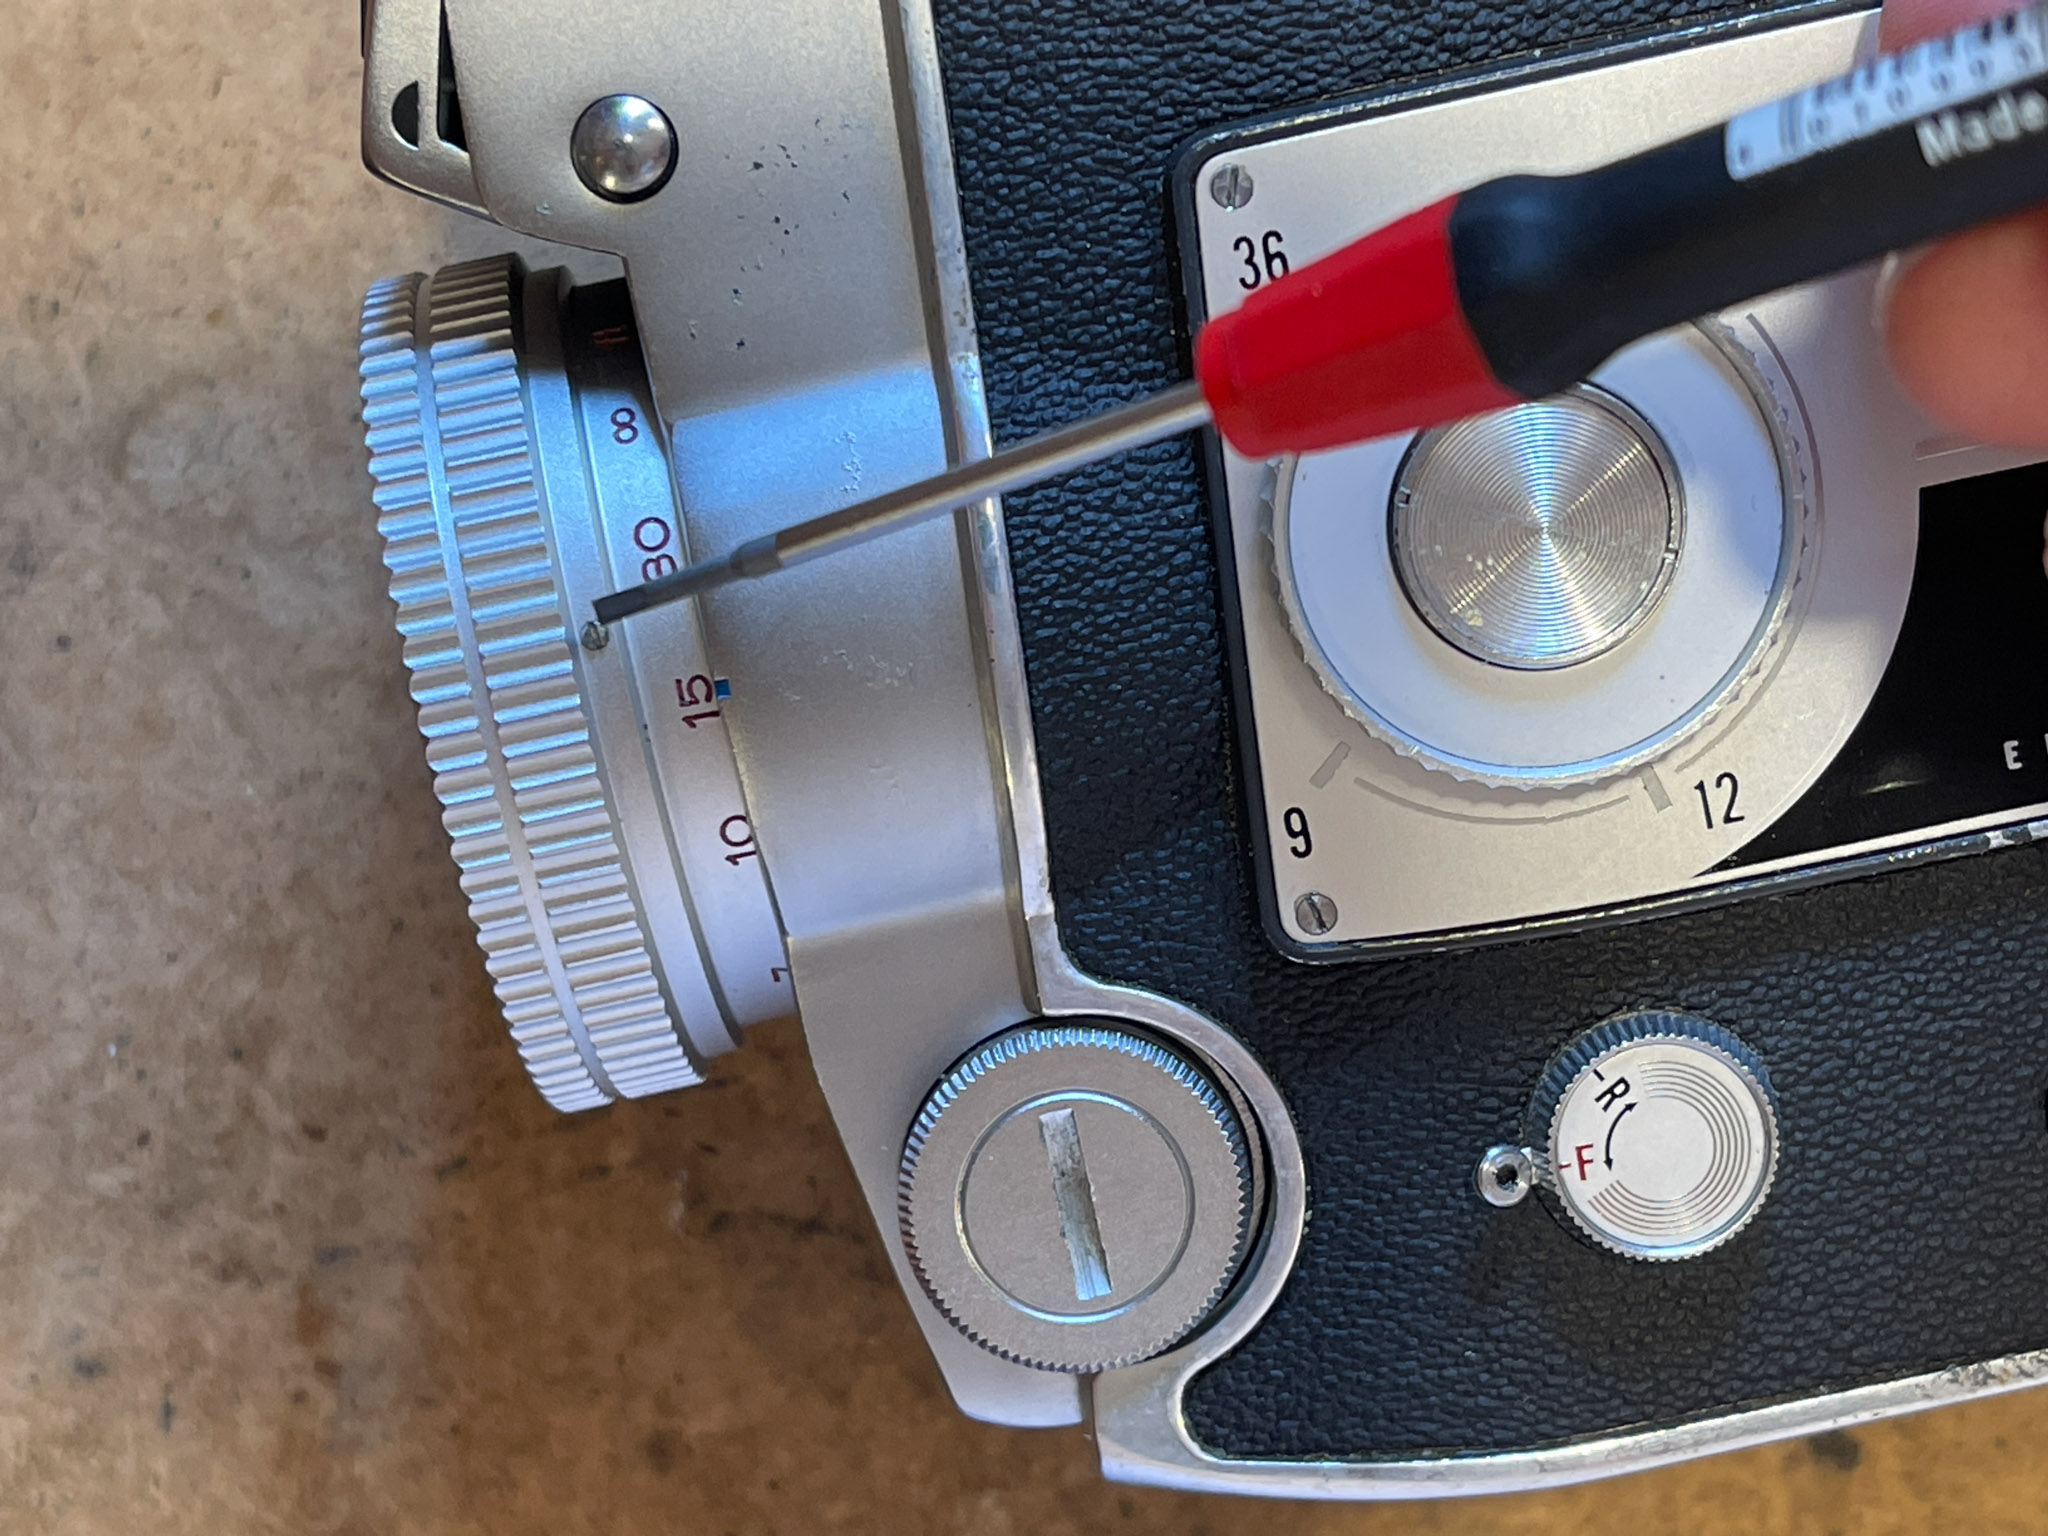
Loosen three grub screws (1.5 mm) on the focus ring. They do not have to be unscrewed completely, loosening is sufficient. The ring can then be pulled forward. 
Now the front of the camera can be gently detached. Attention: The exposure meter battery is stuck with a cable that needs to be soldered. 
Now the rubber pad on the underside must be loosened. Since this tears easily and is very tightly glued, we use the heat gun (about 100 °C), a lot of patience and a spudger. Proceed with a lot of feeling here! 
Since you should not pull on the rubber, it is best to start from all corners. It can also help to drizzle a bit of IPA into the gap. But then be careful with the hot air gun! 
Once the rubber is removed, four more screws appear. Remove these. By the way, the trim pot you see here is for adjusting the light meter. It’s best not to touch. 
Also, the leatherette on top must be removed, but only at the four corners. 
Here, too, it’s best to use hot air gun, spudger and patience. 
Once the four exposed screws have been removed, the lid can be removed. I was quite shocked at what tiny screws this handle hangs on. I wouldn’t trust them… 
On the viewfinder side there are also two screws under the leatherette, you can see them. At this point, the “leather patches” can be removed quite easily. Elmo seems to have brought two of these confetti on top of each other. 
One is down, there is a second waiting… 
Before loosening the two screws, it is best to remove the old adhesive from the screw. 
The recessed pointer plate of the gear selector must also be off. Here, too, hot air helps. With a fresh scalpel, you can enter the slot without scratching the sheet metal. It is very very thin, so by no means prying, just pushing… 
When the sheet metal is off, the switch can be detached with a lens key. 
Last but not least, the leathertte on the trigger button has to be removed. Loosen the two screws underneath and remove the cap. Attention: The tiny washers underneath should not fall into the camera. 
In order to get the side part off, you have to unscrew this plastic piece inside (i.e. without the back part). 
Now carefully press off the lid. Attention: There are also two short cables hanging here, which have to be desoldered. 
unsolder… and remember the position. 🙂 
Here you can see the terribly built-in board of the exposure meter. First, four identical screws must be removed. 
Unfortunately, the spring-loaded lever, which swings out the daylight filter, also has to be lifted off. First, loosen the larger screw that holds the spring. Attention, under it there is a hard paper sleeve that should not jump away. 
Here you can see the structure: sleeve, washer, screw. The part assembly order is important, otherwise the spring makes funny short circuits on the board. 
All the colorful cables have to be unsoldered. Take pictures beforehand, in case the colors are not in like mine in your model… and beware, there are two times red. If necessary, mark! 
To the left of the cables comes a wire from a thicker insulation hose upwards. Unsolder that, too 
In order to get the spring out of the control lever, the control lever must be removed. To do this, loosen the screw… 
… and gently thread it out without bending it. 
Now solder the two wires that come up from the bottom, to the left of the cables… 
… and then two wires on top, see tweezer tips. Caution: Heat the left soldering joint only very briefly, so that the soldered spring does not loosen! 
Now the board can finally be removed. With a 4 mm hexagon we loosen the two nuts that hold the pot. 
Now we desolder the two used contacts of the potentiometer. Attention: Heat and suck only very briefly, so that the wires do not also loosen on the other side. Soldering wig does not work here. 
The pot is free and can be changed. Be careful when threading it out or into the board, the switch mimic is sensitive to lateral stresses. Also, do not bend the switch contacts! 
The white cable was too short for me to solder cleanly… 
… therefore I extended it with some copper lacquer wire. Attention: Insulate the solderjoint so that it does not attach to the housing after assembly!
For assembly, it is simply necessary to proceed backwards accordingly. It is recommended to position the board with the four screws first (without tightening them completely), because if you do not solder the stiff wires coming from below exactly at the right position, the screw holes will no longer be aligned.
Good luck!


Related Posts