When I wrote here in 2018 about my experiments with Eastman Color Negative 7254 from 1972, I never dreamed what much older types of film I would find, still unexposed. Again and again I looked at two Eastman Transparent Film rolls from 1893, which Ebay tried to offer me at the bargain price of over 1800 Euro each.
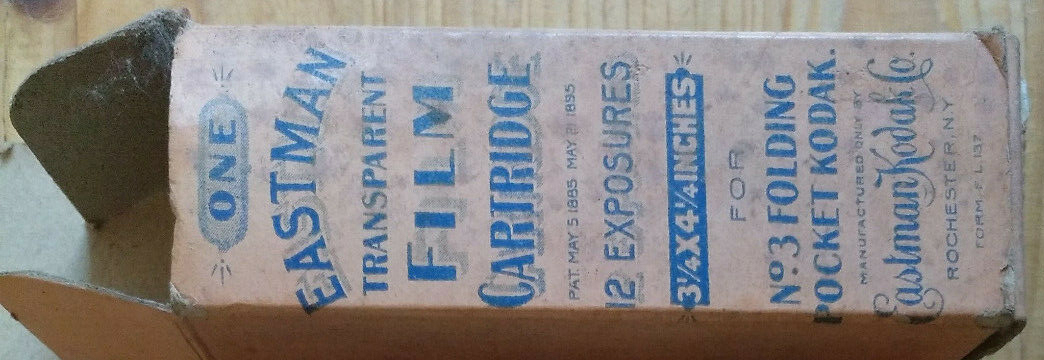
I would have already given up, if not a completely unknown to me seller siddenly offered another roll of this rare stock. An Eastman Transparent film with an expiration date of January 1, 1903, apparently still unused and at a price that made me buy it immediately. Even if this film had been completely broken, I’d probably never get one of these cheaper ever again. Thus began a long series of experiments, which I would like to explain a little here.

After the package arrived with me I unpacked it excitedly. According to experts (more on this later), films at the time had a minimum shelf life of around one year, so it was probably packaged around 1902, making it just 119 years old in 2021.
I started with my usual steps for ancient material. First I carefully examined the film in the darkroom, the roll (similar to 120 film, but 8 instead of 6cm wide) was still originally sealed with adhesive tape. I was totally surprised at what good condition the film was in purely on the outside.
Then I exposed a series of exposures on a small test strip (like with photo paper) with the enlarger. In my Caffenol-for-photographic-paper mix, I developed on sight (under red light) and saw to my delight: the film was still alive and produced a surprisingly good image.
A few days later I tried a first real test subject, from my balcony on the roofs of houses in the city center, on the tripod, 3 pictures with 8 min, 16 min, 32 min exposure time. After all, I didn’t know how long I should expose, so I found that ISO 3 had worked quite well for that time. Developed again in my Caffenol mixture I also found a development time of 50 seconds at 20°C. So now I knew both a suitable exposure time (based on ISO 3 + 12 stops longer for the age of almost 120 years), and a suitable development process in Caffenol in a photo tray. However, I only learned later from the experts that I was wrong. In the meantime, I designed a cutting aid, which I then 3D-printed so that I could use it to cut the 8cm wide film to 6cm (120 format). This allowed me to reuse backing paper from a used 120 film. In it, I captured just enough of the old film for a single frame. That would be the extra challenge, ONE photo, ONE try, it had to work right away!

A week later, on Feb. 27, 2021, around noon, I set out for my subject with my Lubitel medium format camera, a tripod, a cable release, the film roll and a light meter. With measured 1/15s at f5/6 and ISO 3 and 12 stops added for age, I came up with 4 min exposure time.
Then I had the idea that I could just run quickly into the picture and stand there somewhere as motionless as possible. I could pretend I was just standing there reading something on my smartphone, but in fact I could watch the stopwatch closely that way. In addition, my presence would bring something modern into the picture, which otherwise could have been purely visually from the time. So I pressed the cable release, started the stopwatch on the smartphone, ran to the desired spot in the picture and simply looked down at the display. 4 minutes was a long time if you were not allowed to move and it didn’t help to stand in the middle of a street and hope that nobody wanted to drive there. After 3:45 min I ran back to the camera to stop it again after exactly 4 min exposure time.

Out of interest, however, I developed the film without fixing it right away. While drying, it looked like the picture above, opaque and like a brown photo paper. The later scan then revealed the result in the image below.

I was totally thrilled… others apparently as well, because this picture was exhibited at the Fotobiennale 2022 in a gallery, after the end of the Biennale again as one of the few “traveling pictures” selected, which are now to be exhibited over the next few years in always other neighboring countries of Austria.
I was now motivated to experiment further. But I was surprised by the fact that I created a positive image in negative chemistry. To answer these and other questions, I contacted two experts in analog film.
Brian Pritchard, former Kodak engineer in the UK, now “Motion Picture Consultant”. He wrote the wonderful book “How Film Were Made & Shown”, focusing on the UK but still full of fascinating information about the rest of the world.
And then, of course, Bob Shanebrook, known to many, I’m sure, as the author of the terrific “Making Kodak Film” book. He worked at Kodak in Rochester for 35 years until 2003, as an “industrial photographer”, as a researcher, as a “product development engineer”, as a “manufacturing manager”, as a “company spokesman for Professional Films” and finally for more than 20 years also as the “Worldwide Product-Line Manager for Kodak Professional Films”. Along the way, he worked on cameras that were used on the lunar surface as part of the Apollo program. I must admit that it was a great honor to be able to exchange ideas with such a fascinating person.
I asked both experts first why my picture became positive in negative chemistry. Brian speculated that “the film was solarized due to massive overexposure” and recommended exposing at ISO 3, as it did yes, just without 12 stops more for being almost 120 years old. Bob also suggested that “overexposure caused solarization, which resulted in positive images.” In addition, he added that “there are very few details on sensitometry or manufacturing practices from this period” and he assumed that “film at this time was dated about a year into the future,” suggesting a likely manufacturing year of 1902 and making my 2021 film just about 119 years old.
But I had more questions and checked with Mr. Shanebrook: Why had I massively overexposed the film, when normally the rule of thumb of one f-stop more per decade of age to expose (also in my many years of experience with ancient films) worked out very, very well? “Those old emulsions were pretty simple in structure. They were silver halides, sensitized, and a little sulfide that found its way into the raw material (gelatin),” Bob replied, “It definitely wasn’t controlled. The film had lost maybe a stop or two of sensitivity, but the original sensitivity of the silver halides remained.” In addition, he explained that “such emulsions underwent several solarization cycles at extreme exposure. Each subsequent cycle had a higher dmin and a lower dmax until the signal-to-noise ratio reached zero”. The previously mentioned rule of thumb of one f-stop sensitivity loss per decade could therefore not be applied to such old films. That was because the rule “assumes that film ingredients deteriorate. That may be true for ingredients used in the mid-20th century, but early 20th century materials did not change the sensitivity,” Bob replied. Then he sent me another article about the camera he helped develop for Apollo. Wonderful!
In the meantime, I started thinking about how I could do as many more experiments as possible without using up the remaining film too quickly. Smaller film formats were the obvious solution, so I again designed a 3D-printed cutting guide for 2 frames on 35mm film, mounted the nitrate film, and set out with the 35mm camera.

Unfortunately, there were various problems, including overlapping shots, as well as totally lousy flatness and therefore blurred images – checked off, was probably nothing, on to the next format… 110!
So I made myself a cutting aid again and cut enough for four 110 images. Rolling the film into the black paper and loading the cartridge were both rather fiddly steps – not fun and tedious in dim red light. Somehow the cartridge then also jammed and later even popped open. Due to its strong twist in all directions, the film had probably slipped slightly on the cutting surface. It was now 1-2 mm too high and therefore pushed the cartridge open.
No problem, just trim it again, right? Easier said than done, the film twist was hard to tame, crooked cuts the result. Now I was finally unnerved and had enough, it would probably be enough for tests, who knows if it even worked, with such a tiny format and the crazy film twist. Unfortunately the weather was pretty lousy this weekend, freezing cold, dark and then came light snowfall, not the best conditions.

But at least I was now extremely economical with the 110 film format in order to have something of this rare film for even longer. The Minolta, unlike the Lubitel, had a zoom lens and even a macro setting. Film drying was much faster and scanning also worked quite well.

In the meantime, I had built myself a better cutting aid, thanks to what I learned last time. With that, the second self-portrait then worked out at a small bridge in the middle of the forest.

The next and for now last experiment I planned was something I had been working on for years with other film, trichromy, black and white film shot through R, G, and B filters and then stitched together to create colored images. What was new for me now, however, was the idea of trying it on nitrate film. The 110 Minolta was to be used again, but the problem now was that I had to change the color filters in front of the lens three times and wind the camera by hand, which would move the camera or the tripod, which in turn would lead to problems with the correct overlapping of the three images.
That’s why I designed and 3D-printed a few more helpers. A quick-release plate with trapezoidal connectors, through which I could easily lift the camera upwards without moving the tripod, but which would always position the camera the same way thanks to the trapezoids, the pins would guide it towards the correct position. And the matching counterpart, which could be clamped in the tripod. The camera was connected to the tripod only by gravity, so I had to be careful not to knock the tripod over.

For the lens, I constructed a filter holder with double-sided tape, through which I could quickly exchange R, G and B. With this setup, I then shot an RGB test image.


But unfortunately, what I had feared before came true. This film was not panchromatic at all; while it rendered blue strongly, it was practically blind to red. The result had a little bit of color, but was still quite disappointing.
At this point I stopped further experimentation and returned to more modern films. Even though the final results fell short of my expectations, I was able to rejoice again a year later when the original 120 photo was selected for the Biennale. An enlarged scan of it will now tour Austria’s neighboring countries.
That one roll of Eastman Transparent film had given me many exciting hours, a few good photos, and a chance to interact with fascinating film experts. What more could you want from a random find from Ebay?


Related Posts