I am an analog filmmaker. Therefore, I also want to project my films. Of course, I also scan them and then publish them where everyone else does these days, but I don’t want the end product of my work to be digital film.
I love color film. If I want to get projectable color film ads end result, besides everything possible and impossible expired from ebay, I have only Ektachrome left, and I never really warmed up to Ektachrome. The stated 100 ASA tended to underexpose it, at least for me, and most Super 8 cameras expose it like 160 ASA. All not satisfactory.
However, there is a large number of wonderfully fresh color films with 50, 200 or 500 ASA – for daylight or tungsten light. But these are just negative films, with that hideous orange mask. Well, these films were not made for the aging men’s rooms of home projectors, but for the professional workflow: filming, developing, scanning, digital post-production. The result is then a digital film with a cine look. I don’t want that.
Long before there was any talk of a professional workflow, filming was of course done on negative as well. After all, that has quite a few advantages. How did that go again? Oh yes: filming, developing, analog post-processing, making positive copies. After all, the film could not simply be viewed on a mobile phone, but had to be shown on the big screen.
Of course, you can still have this done in very good quality today, thanks to e.g. Andec. However, as an experimental filmmaker and film hobbyist, I want to run my film through my own loving hands from the first minute to the last (and I also have a limited budget), so my goal is to make positive prints from negative material at home as well.
In black and white, I’ve done this before. The Ekran 8, a cute Soviet Normal 8 pocket camera, has (as only camera ever?) a built-in contact copy function. But that’s another topic, and unfortunately there is no copy film in color for Normal 8 anyway. So the Ekran does not help me.
For a contact print, the negative and print film must be placed emulsion to emulsion, the light must pass through the negative onto the copy film, and this must be done frame by frame without slipping. A conventional projector should be able to do that, I thought. Since only a constant amount of light has to hit all parts of the film that will be visible later, exposure can also be made from the front through the lens. The film transport phase can therefore be neglected in terms of exposure, as long as the film is always transported without slipping.
Level 1: Super 8
To try this out, I took my old Elmo SP-F (it’s certainly not the best projector ever made, but at least it has a sprocket on the film feed), and put a dimmable LED in front of the lens. Oh yes, I disconnected the complete lighting of the projector beforehand, of course, because copying has to take place in complete darkness. The projector must not light up like a Christmas tree.

After the first test run in black and white, I discovered thick, dark streaks on each frame. After pondering for a while, it made sense to me: Only the gate facing the projector lamp has the exact size of a single image, the gate in the pressure plate of the film channel is somewhat larger. I then reduced the size of the window with black tape. But this is fiddly work, because the smallest error gives a light (or dark) stripe. I still haven’t made it 100%. Tip: for each film to be copied, the frame line must be adjusted exactly, only then the minimal bar will sit exactly between the individual frames.

So now for the color film. Last year I had already bought a few meters of Kodak Eastman 3383 print film. I also own the color developer substance CD-2 for the self-preparation of ECP developer, furthermore ECP2 developer solution does not consist of particularly adventurous components. I have prepared a few sachets on stock for my use. The developer oxidizes quickly, and nowadays there are more than enough small PE bags in the house.

The result of my first color print: a disaster in yellow. In addition, the wide double-exposed stripe in the lower part of the image is also clearly visible:

Of course, every experienced photo enthusiast now says without looking at the result further: Color prints need color filterd light to let the colors be right! So willy-nilly, I had to look around for a color mixing enlarger head. Actually, I wanted to implement my project using only the home remedies available to me, and so far I actually hadn’t spent a dime. However, I soon found an Omega C760 mixing head on Ebay, which was offered to me for extremely little money, since all the other necessary accessories for making color enlargements were missing. But I didn’t need those anyway. After unscrewing a few more parts that were useless for my purposes, it now shines nicely into my lens. By the way, the amount of light can be regulated well via the speed control of the projector: The slower the projector runs, the more light comes onto the image.

Many, many experiments (and some trouble with the developer solution) later I had arrived at quite decent results. Filtering 70-25-0 (YMC) gave a true-color positive (which can still be optimized, of course). It will be even better when I obtain fresh copy film. Last year’s 3383 unfortunately got a green tint. You can also see in the result that the poor Vision3 50D original negative has already suffered quite a bit due to my extensive experimentation.


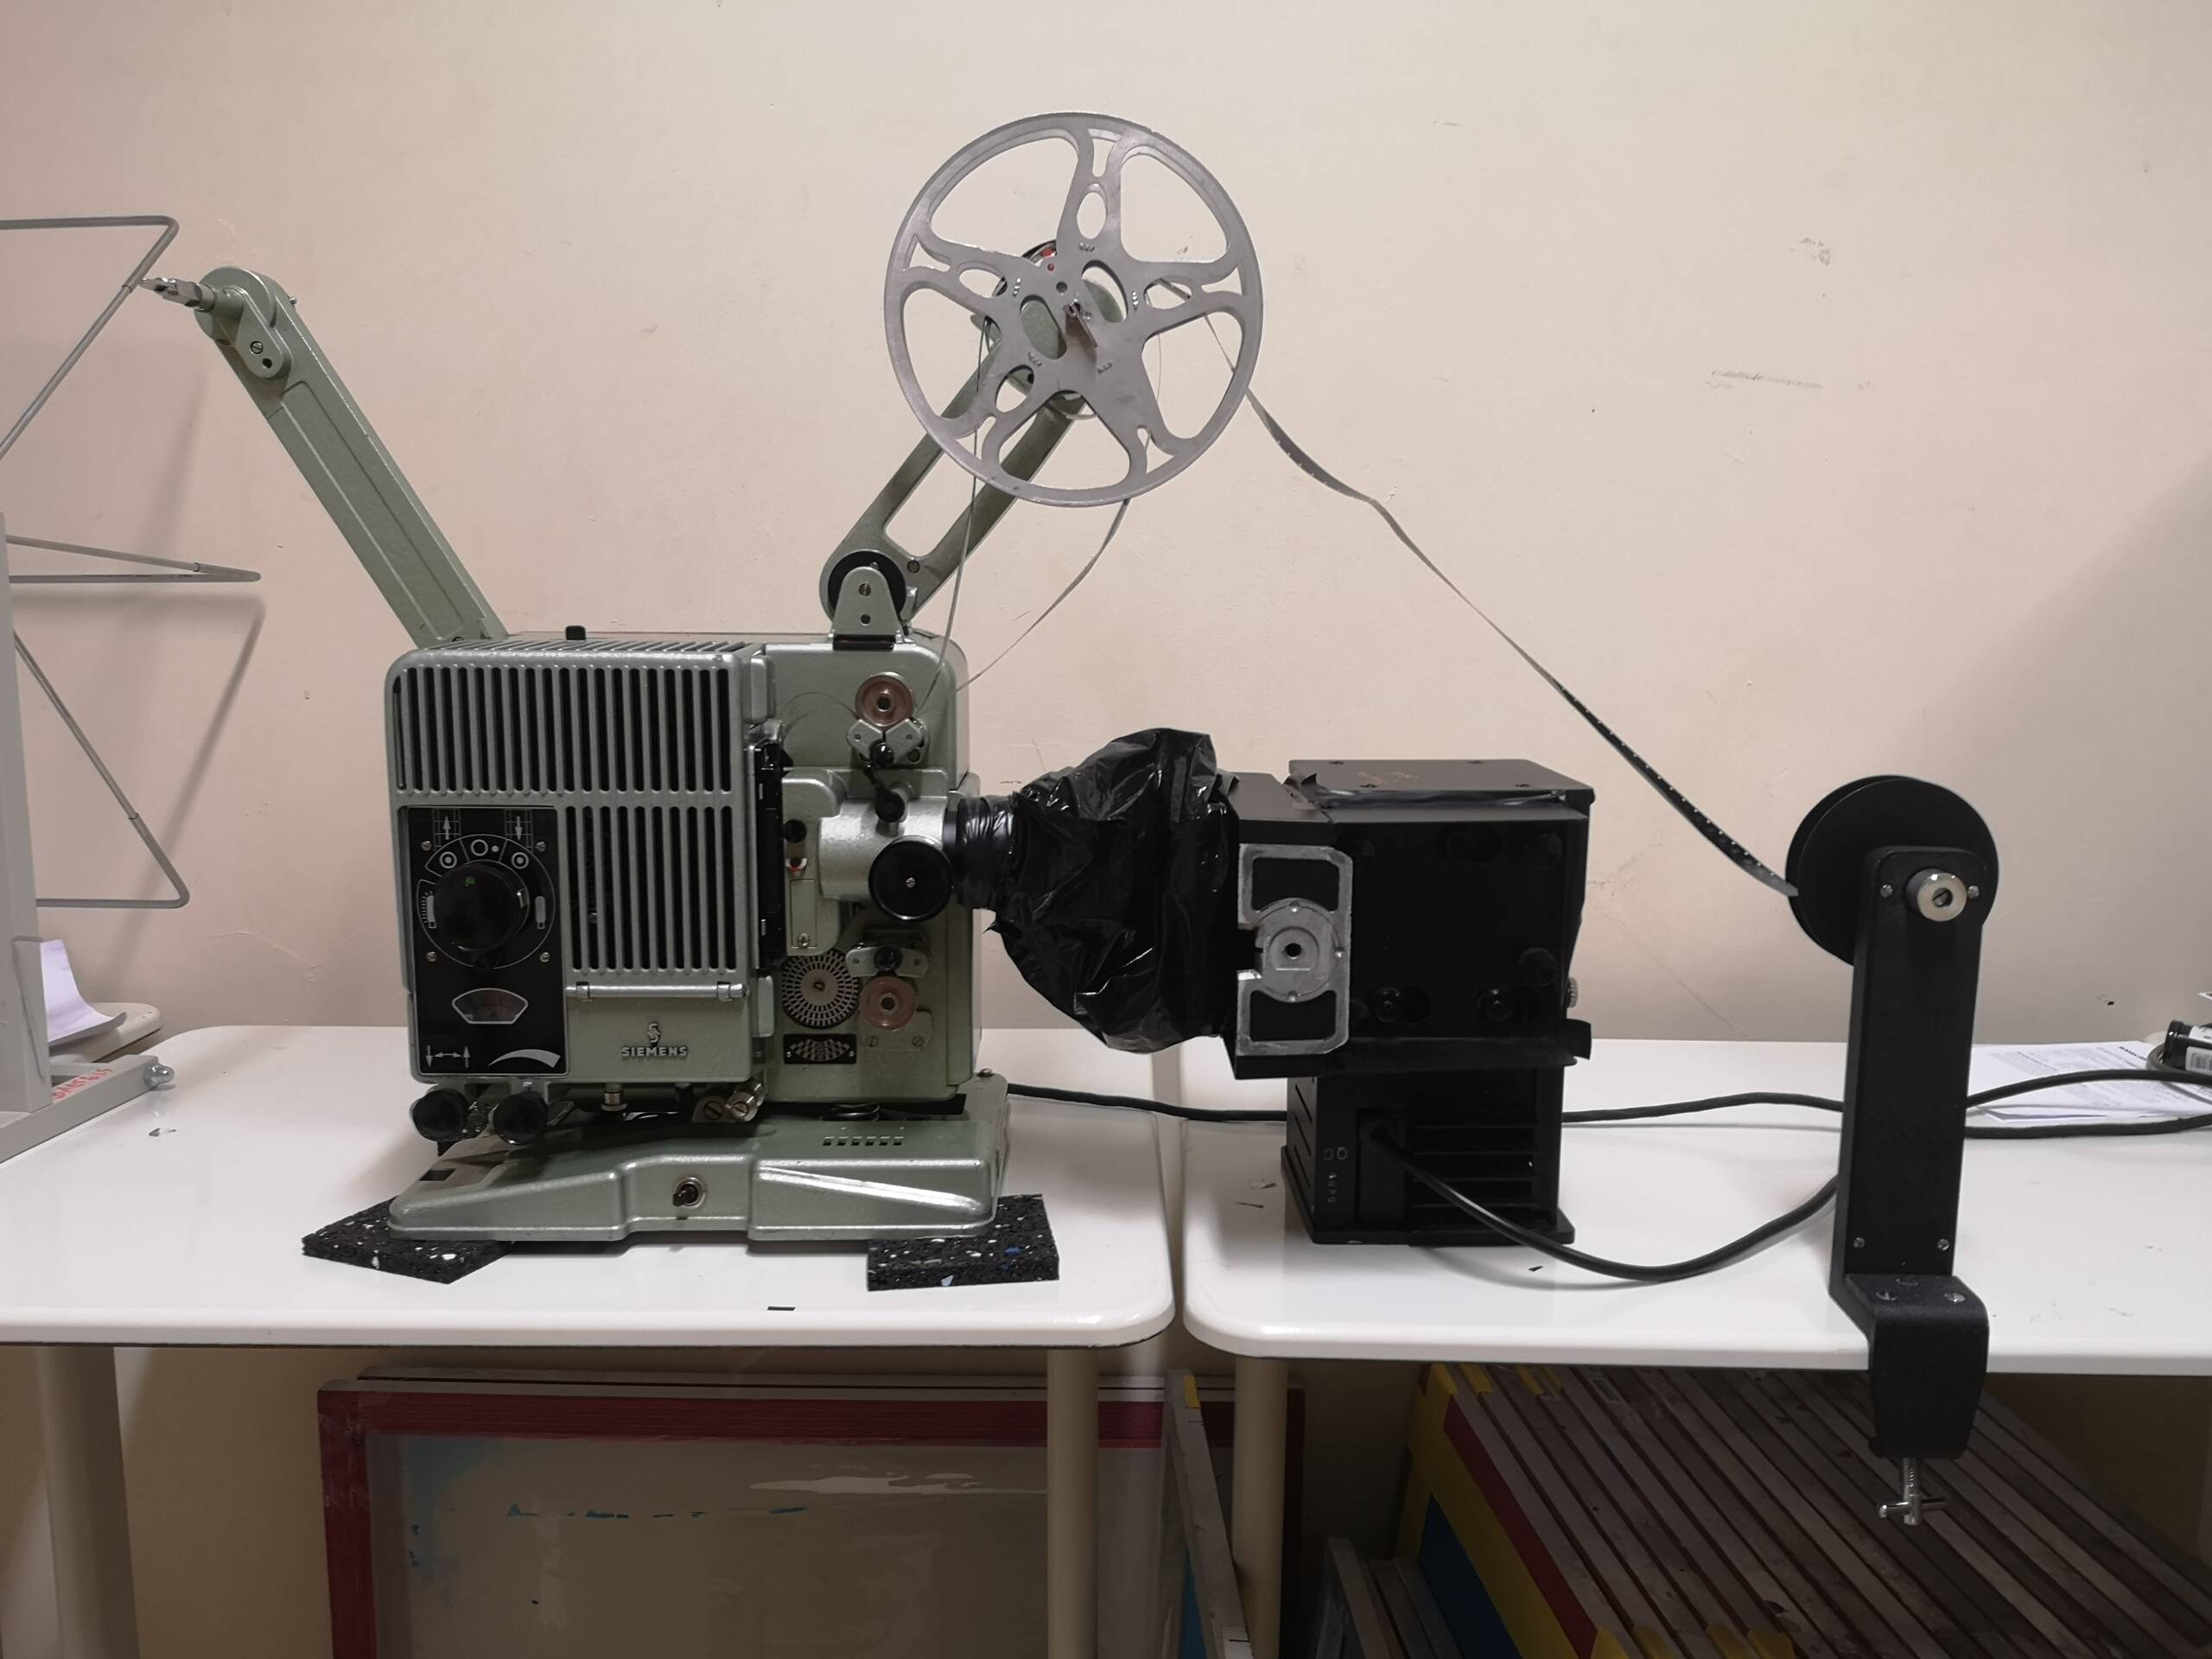
Level 2: 16 mm
What felt good on Super 8 then became even better on 16mm. My setup for this film format consists of a Siemens 2000 projector with a Bauer Zoom projection lens. Incidentally, black film bags are perfect for creating a light-tight connection to the exposing color mixing head.
After my experiences with the Elmo SP-F, which doesn’t pull in the film very reliable, only copies precisely in reverse, and likes to punch the odd running stripe into the film, the Siemens projector is a pleasure to work with. The simple, accessible technology without automatic threading and far-flung bells and whistles makes it possible to produce precise copies in a single pass. There are fewer runs, fewer scratches and less fear of total failures: A wonderful device! At least my first generation Siemens (without asbestos, almost without plastic parts and still with the funny oil felts) seems to have been built primarily for this purpose. The results look much more consistent than the positive prints from my Super 8 setup.


Screenshot from my film “The Eye” – Kodak Vision3 50D (D8), positive print on 16mm
In conclusion, however, it must be warned that when homemade, the results also look homemade. You can’t do it without tread marks and minor color fluctuations. The negative film should be exposed in the camera just as precisely as a reversal film, because exposure fluctuations cannot be compensated during printing with this system. Nevertheless, I am now more than satisfied because I can use the full range of Kodak Vision3 films, get presentable results on stable polyester film at a small price, and last but not least, a unique look.
Everything again in a nutshell to do it yourself
- You need a projector that has two sprockets, if possible, has adjustable speed and must have all lighting removed.
- Exposure takes place through the lens with the help of a color mixing head
- Both films lie emulsion on emulsion: the print film with the carrier side facing the (removed) projector lamp, the negative with the carrier side facing the lens
- Attention: For this, both films must be wound “upside down” into the projector
- My tip: With Super 8, the copy process is most stable in reverse. First, both films are run through completely without exposure, then the copying process with exposure takes place in reverse of the projector. But this is only a personal experience, which I can not explain logically
- A good starting value for filtering is YMC 70-30-0. However, this depends on many factors (especially the lamp in the mixing head) and must be found out for yourself.
- The ECP process is used for development. The color developer (Kodak SD-50) is self-mixed with few ingredients, the recipe is published in KODAK Module 9
- The film development itself is not very time-consuming: 3 min CD (37°C), approx. 1 min stop bath, 1 min in conventional bleach fixer.
Thank you!
Without the help and advice of Friedemann Wachsmuth and Ludwig Draser from Andec Film, this project would have been doomed from the start. My special thanks go to both of them. And, of course, the unknown youngster on the e-scooter who drove so brazenly into the shot of my daughter, who was shooting my test film in Paris. The red gate, the turquoise scooter, the color of the face and the pale blue sky (which unfortunately gets lost in the green cast of the expired film) make for a decent test image.
Always popular:
Outtakes (which also illustrate that the final result was not quite as easy to achieve as it may sound).


Related Posts